Wednesday

Welcome


GREEN PEAS

We are a voluntary non profit organisation in South London, we grow food ,herbs, flowers, we sell, and help others to grow

People and the community
A workers’ co-operative. This is a form of organisation where the activities are managed by the workers directly, without the need for separate managers, owners, or bosses. Green Peas is a not-for-profit organisation and soly relies on voluntary contributions and grant fundings.

We want to see a world based on equality and co-operation, where people can take control over all aspects of their lives. Taking collective control over our own work is a starting point…
Permaculture
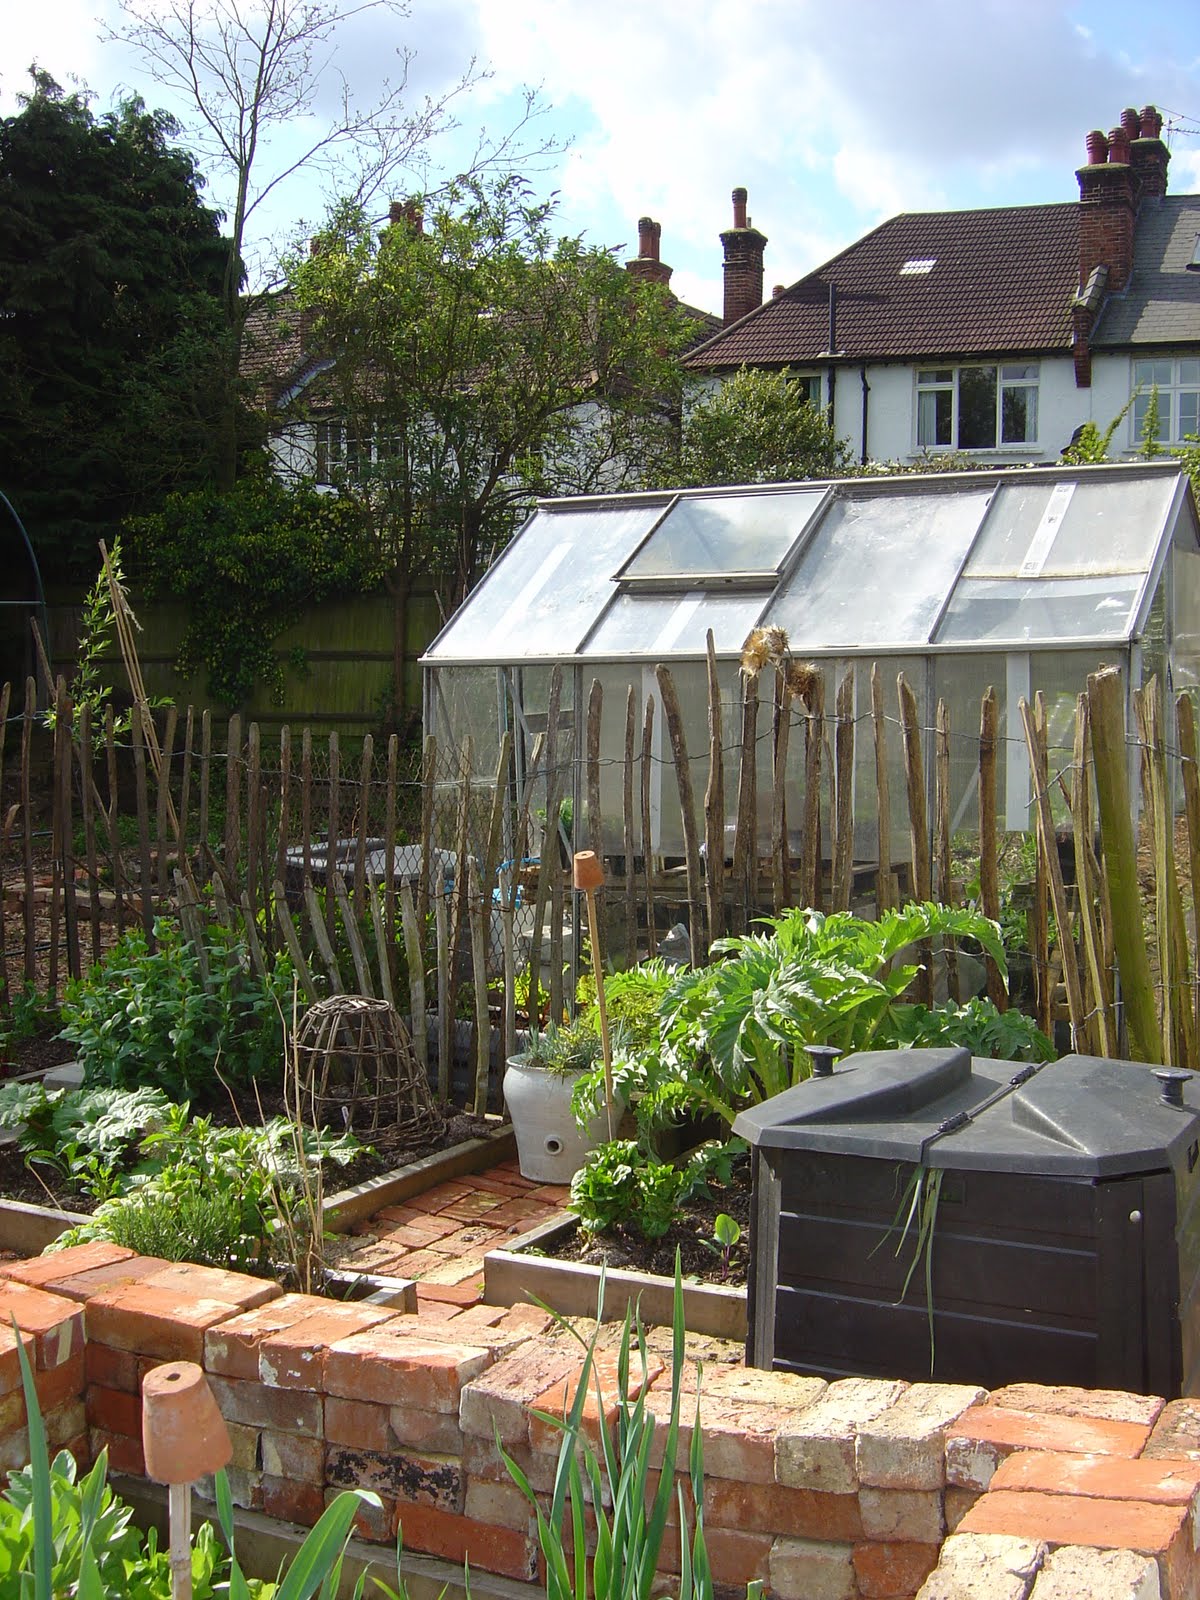
Within Green Peas we have Grow Mayow the nursery and community garden, here you will see many examples of permaculture food growing in practice. This includes companion planting – putting beneficial plants side-by-side, rainwater harvesting system, and recycling of materials.

As well as considering permaculture in our food growing, we aim to apply the idea of permaculture and interconnecting elements to our work away from the site. This includes encouraging others to get involved in our projects.

Green Peas initiatives

•Support people to develop in horticulture skills.
•Training, workshops and other learning We give practical support to local community groups and organisations that want to start or develop their own food growing projects.
•We sell seasonal vegetables and growing resources (like compost) with planting advice
on site.

Sunday

Growing permaculture in the city


Permaculture is starting to make small changes in the way you live your life, and knowing that all these small changes add up and can make a big difference.

If we are to keep progressing as a culture which does not destroy itself by damaging the systems upon which its own survival depend on, than we seriously need to address certain cultural behaviour and outlook.
When it comes to Environment, and sustainability we need to think and digest it for a while, thus lets REDEFINE PROGRESS using some permaculture terminology.


Observation, Boundaries, Resources, Evaluation, Design, Implementation and Maintenance.
These are mere indication steps that one could simply use when doing just about anything creative with keeping progress in mind.

Observation
By merely observing with a watchful eye, one could start to actually see life through nature’s point of view. Observing the works of nature, the path of the sun, the dominant trees or plants, the season’s changes, the way the rain falls and the streams that follow, etc This could all be a good part to what we have been overlooking for many years.
Simply observing and taking notes of what we notice is a great lesson to be learnt from nature. In earth tribes such as the aboriginals and the native Americans, the elders are consulted and respected for they hand down their observations from one generation to the next.

Boundaries
We must always keep in mind to tackle a problem at a time and break it down as simply as possible in order to manage it better. Boundaries help us to define where we are working on and also protect our work from undesirable outside forces. In the example of a garden, a boundary is needed to protect that which you have worked on or plan to work on.
Resources.

If we had to be strict, a community is not sustainable unless it can survive off its own land.

In a modern and industrialised world, our food, clothing, equipment, and even water (the main element supporting life) is more often than not imported from other countries while making negative ecological and or social impacts of some sort or other. These factors are mainly subject to political forces that dictate global commerce.
Thus resources are looked at very differently in Permaculture.

In a world of waste, over consumption and uncontrolled competitive growth, resources need to be valued and guarded as common heritage.

Money doesn’t grow on trees, but sometimes food does.

Evaluation
Through this process, evaluation is a constant tool necessary to see where the direction is going and what elements are yielding better than others. Once we evaluate, we have an outcome with better indications of what is actually progressive or most likely to be progressive.

Design for success.
Remember that Permaculture is a design process.
Whether it’s a school playground, a community garden, a farm, a forestation project, a roof garden, a building or an entire village, design with these steps is the key to putting the permaculture principles which will yield better results.

Implement the ideas
Implementation is the actual doing. Using the actual ideas and getting them to manifest from paper to shape is the next stage of work. It is very important to keep the permaculture community support and share the work experience. This is where we get the opportunity to experience that which is learnt from the points above.

By using Permaculture design principles, one could simply start at redefining progress in this way. Progress is a broad concept, but simply put, society needs basic standards of health and natural resources in order to sustain its existence.

Achieving quality of life within the means of nature is progressive in a way that:
· Does not decline biodiversity
·Increases and values the natural resources and common heritage

Simple tree planting is a way of increasing the natural heritage.
If a culture does not keep the points above as its indicators of progress, then it isn’t progressing at all. And it is here where hundreds and thousands of people worldwide have chosen permaculture as a strong community tool to become part of a progressive movement that recognises a re-defined progress.


Permaculture garden - a mixture of decorative and edible plants


A local Permaculture project Run by the lovely Ruth Robinson is
St saviours Community garden

Permaculture festival 2010
guide

Saturday

Herbs

WHAT IS AN HERB?
There are three generally accepted definitions of an herb. Botanically, herbs are non-woody annual, biennial, and perennial plants that die back each year after blossoming. Another definition describes them as any of the herbaceous plants valued for their flavour, fragrance, or medicinal properties. The third is actually not a definition but a distinction between the culinary herbs and spices.

There are hundreds of different varieties of herbs. Although you can buy them from any local grocery store, it is much better to grow them in your own backyard. By growing them in your own backyard you can assure the long lasting availability of garden fresh herbs. This will uplift the taste and flavor of any dish and will make your gastronomic experience more enjoyable.


The botanical definition includes many plants that we ordinarily think of as weeds (and even eliminate from the garden when they appear) and therefore never cultivate as we do marjoram or sage. Many vegetables and ornamental garden plants also fit this description, but they are not usually thought of as herbs. Excluded by the definition are a number of shrubby and woody plants such as laurel and rosemary, which for centuries have been two of the most distinguished herbs.

More flexible is the second definition which singles out herbs as being useful as flavouring, scents, or medicine. But, because our uses of various plants change as our needs do, a list of plants that could be considered useful will differ from culture to culture and from century to century. Also, this definition does not distinguish fragrant flowers such as gardenias from the fragrant herbs such as lavender and germander.

In cooking, a distinction is made between spices and herbs. Spices usually are considered to be derived from the roots, bark, fruit, or berries of perennial plants such as cinnamon, ginger, nutmeg, and pepper; herbs are the leaves only of low growing shrubs and herbaceous plants such as basil, rosemary, and thyme. There are several plants, however - such as some of the roses - which are included in herb listings even though their fruit (rose hips) is used.

Because of these complications in defining herbs, it is perhaps easier to understand their nature through the ways they have been used and thought of in the past.

There are 3 different herbal plants types. Before going towards herbs growing tips, it’s important for you to learn about these 3 different herbal plants types:

Annual
These types of herbs live for only one season. This group of herbs includes chives, mint, lemon, oregano, sage, rosemary, basil and etc.

Perennial

These types of herbs live for many years. Although in winter season they shake leaves but their roots remain alive and in spring season they again bloom into new foliage. This group of herbs includes balm, marjoram, catnip and etc.

Biennial

These types of herbs live for two years. The first season is for growing and in second seasons seeds are formed. At the end of second season they die. This group of herbs includes plant like parsley and etc.

If you love cooking, you have to grow a range of herbs. With this selection in your garden or in your window boxes, your food will excel. Spring and summer:
Basil 'Sweet Genovese' (organic) - strongest, sweetest tasting basil you can grow
Chives (organic) - sharp, oniony flavour perfect for salads and cold soups and pretty edible flowers
•Marjoram 'Sweet' - the best herb with cooked tomatoes, invaluable, for pasta sauces and pizzas
Parsley 'Giant of Napoli' (organic) - the best flavoured parsley of all
Savory Summer - a lovely thyme-like herb to grow and eat with beans, beloved by Jamie Oliver Culinary
Thyme - the well known pretty and delicious herb, ideal to eat with any meat Autumn, winter and early spring
Chervil - lovely in a winter salad or in simple herb omelette
Coriander fantastic oriental herb which grows much better in the cold than the hot and dry
Sorrel 'French' - sharp, citrus flavour which will crop lightly in autumn and early spring as well as summer
Sage 'culinary' - lovely smoky flavour for eating in stuffing and with any pork dish

Some herbs look stunning in the garden and just like any other plant just grow what you fancy ,one of my favourite is Bronze fennel below

Thursday

Permaculture some principles


Companion planting

Permaculture gives us a set of principles based on ecological, human and economic sustainability brought about by observing natural systems and applying clever, thoughtful design. It brings together many traditional farming techniques and practical, proven ideas and weaves a good dose of common sense throughout it all. If these principles are applied to the landscape or a community, they can bring about real change, save energy and move people toward a more sustainable way of living.

Biological resources
Follow nature’s lead and value the biological resources that surround us. See the value in what is around you. Whether human, animal, plant, landscape or soil – understand how it works and how to utilise its resources. Understand the limits to these resources too and ensure you don't overload them.

Example – value the microbial workforce above and below the soil and don’t spray chemicals. Use plants as shade and for cooling your home. Move away from unsustainable fossil fuel dependency toward more biological resources.


Zones
Create efficiencies in your design by placing the things you need to use everyday and the things that need your attention every day closest to your house. Plan out from the back door. Zone 1 is the most intensive, Zone 6 the least intensive. Zones reflect human energy efficiencies.

Example – if you love a herbal tea every day, have your herbs by the backdoor.

Relative location
Everything in the design is placed in relation to another – they all assist and support each other. Everything is beneficially and beautifully connected.

Example – plant medicinal herbs for the chooks near the chook pen. Have a compost bin near the back door to ensure kitchen scraps are regularly emptied. Build a big compost system in the fruit orchard so you don’t have to move it far when its ready. Think ‘smart placement’. A compost bin right near the house ensures your kitchen waste is emptied everyday and that this bin is cared for and maintained which in turn ensures it produces bucket loads of beautiful compost for us.

Energy recycling
Both human, nutrient and fossil fuel energy is recycled through the permaculture system. 'Produce no waste' is the mantra we chant. Close the loop and keep the energy cycling through the system. One system's waste becomes another’s raw material.

Example – kitchen scraps are fed to chooks, chooks then manure in their bedding, bedding is then added to the compost system, it creates soil, it grows our food, excess food is fed to chooks and so it goes. Don’t let valuable nutrients leave your property (eg compost kitchen scraps, don’t put them in the wheelie bin) keep them recycling through the system improving fertility year after year.

Saturday

organic gardening


what is it?
It’s getting down and dirty to produce your own fruit and veg (organic of course, which means no chemical fertilizers or pesticides – you don’t want to poison your garden, wildlife or your family).
What you get is fruit & veg in season all year round (more in the summer of course), fresh, organic, and straight from the garden – once you’ve done it you’ll realise the difference in taste. Food grown using chemical fertilizers really doesn’t taste the same, because chemical fertilizers are water soluble, and so are taken up by the plants as they drink, whether they need them or not; they grow faster than they would naturally, and become large and watery. Finished compost, or well-rotted manure (well-rotted is a phrase you hear a lot, but it’s important) is not water soluble, and plants can take as much of it as they need.
As for pesticides, let’s take slugs as an example: slug pellets or other pesticides will certainly kill them, but not all of them, as there are so many. The poison will become concentrated in the birds that eat slugs, however, and could seriously reduce their population, resulting in an epidemic of slugs, with nothing to eat them. You’d then need more pesticides, and you’d end up in a toxic downward spiral, which probably isn’t a good idea in your back garden.
You can try to produce all your food from a half-acre plot, or grow a few herbs in a window box. If you live in a tower block, with not even a window box, you could rent an allotment (contact your local authority). It’s a fantastic hobby that will keep you fit, provide you with fabulous food, and enhance the environment.

what are the benefits?
No pesticides, which harm soil micro-organisms, wildlife, and of course, humans.
No chemical fertilizers either, whose water solubility means that when it rains, they are leached from the soil, into ground water or water courses, and cause problems due to excess algal growth starving other organisms of oxygen. The production and distribution of pesticides and chemical fertilizers requires energy, emissions, factories and trucks; who needs them?
Organic gardening uses compost, which builds soil structure, and stops leaching of nutrients and soil erosion; the compost heap takes your kitchen and garden waste, instead of it having to be transported to landfill.
It also encourages earthworms, which aerate the soil, and break down organic matter to produce rich humus – chemical fertilizers and pesticides kill worms.
Food that you grow yourself has no packaging and doesn't have to be transported on trucks to supermarkets.
what can I do?
Don’t read too much before you give it a go, as there is so much information out there (some of it conflicting) that it can be a bit bewildering. Start with something easy – onions, potatoes, or beans, and just do it, while gradually reading more to increase your knowledge, and then grow more new things each year. Ask other gardeners – they’ll probably be only too happy to share their experience. Decide what you want to grow – what you like to eat, in other words; start a compost heap (from kitchen and garden waste); and get some garden tools (car boot sales are an excellent source). If you don’t have a plot that’s been cultivated already, there will be some initial hard work as you dig out all the weed roots – but it will be easier from then on, especially if you mulch (cover the plot in something to hold moisture and suppress weeds – straw is probably the cheapest and easiest mulch material). You can get a pH testing kit from a garden centre to test your soil. Most plants like a neutral to slightly acidic soil, but a well-composted, poison-free soil will balance its own pH, so don’t worry too much.
Plan your garden. Grow four beds – of potatoes, root crops, greens, and beans / peas, and rotate each year. This is an important principle of organic growing; different crops take different nutrients from the soil, and are attacked by different pests, so a new crop each year means that nutrients aren’t exhausted and pests can’t become established. Some plants stay in the same place for a few seasons (strawberries), or for good (rhubarb, fruit trees and bushes).
Buy organic seeds and do what it says on the packet. Sow brassicas (cabbages, Brussels sprouts and other greens), beans and lettuce in seed trays (around March, indoors or in the greenhouse), in compost from the garden centre (as it won’t contain weed seeds) – make sure it’s peat-free; later, prick out into individual pots (now you can use your own compost); then plant out in May. Other crops can be planted straight outside.
There are lots of different jobs to do at different times of the year, and for different plants – books will give more details, as well as exactly how to grow different fruit & veg - when to sow, plant out, harvest etc, and what protection they need. Beans need poles to climb, young brassicas need fleeces to protect them from birds and cabbage white butterflies, and so on.
You can control pests in various ways: rotation; companion planting (onions with carrots, and flowers between the veg – examples of good insect repellents are marigolds and nasturtiums); spray soapy water to repel aphids, and salty water for cabbage white caterpillars. An organic garden will have healthy soil and disease-resistant plants, with predators to eat pests - ladybirds, hoverflies, centipedes, and of course birds (cats are bad news); you could install a pond for frogs.
Watering is best done in the evening, so the sun doesn’t dry it out; it’s a good idea to install a rainwater butt. You can grow tomatoes, basil, cucumbers, aubergines and peppers in a greenhouse.

Friday

containers


You'll be amazed how much you can grow in some containers on a patio. From strawberries in barrels to potatoes and salad crops, they can all be grown well in containers and are attractive as well to be a decorative feature


Saturday

Get gardening


Get gardening,
The grand essentials of happiness are: something to do, something to love, and something to hope for

No space to grow vegetables?
Don't worry, you can try a square foot garden, a method of growing vegetables in a very small space.
How do we start our square foot garden? Measure out an area 122cm x 122cm and mark the corners with pegs. Use untreated timber 3cm wide and 10cm deep. Cut 2 planks of wood 122cm long and 2 planks that are 116cm long. Take one of the 116cm lengths. To each end of the plank screw one of the 122cm lengths. When you have attached both, attach the final 116cm length to make a square. Place your square on the area that you have marked out, and fill with soil. Divide the square into sixteen x 15cm squares.
Nail long (at least 125cm) shoelaces or cord across the box to mark these squares clearly.
An established square foot garden Now you will need to decide which plants you are going to grow. You will need to research (find out about) this carefully as some types of vegetables and plants will do better than others in this small space. Each square will be planted with a different crop (type of plant). Work out the compass directions. The side of the square foot that faces south is the front. Tall plants should not shade smaller ones. The tallest plants should be at the back of the bed.
What can we find out?
While you are creating and maintaining a square foot garden there are many investigations that you can try.

• Building your own square foot garden.
• Research the plants that will grow best in such a small space.
• Sow and raise your own plants from seed.
• Work out how much it cost you to grow the plants. Then find out how much it would cost to buy the same amount of vegetables from a shop.
• Use plants to attract predators that will eat pests.
• Work out a crop rotation plan.


If maximizing garden space is anywhere near the top of your priority list, then any of the root crops will be an ideal choice for the square foot garden.

Root crops are frost tolerant and, though the greens are commonly eaten in salads, the primary edible portion of the plant is underground, protected by soil and mulch. Roots are edible at practically any stage of maturity, so season length is less important than with other vegetables

Carrots one of the most popular and easiest vegetables to grow in a backyard garden, they are an ideal choice for a Square Foot Garden

Beets
are another ideal choice for the small garden. They prefer cooler climates and can sometimes survive a frost. Despite their proclivity to cold weather most beet varieties can withstand all but the hottest locations. They like full sun, but if necessary will grow in partial shade

Radishes may be the easiest and fastest vegetable you will ever grow. Little planning and space is required. A square foot will contain 16 plants.

Sweet Potatoes
in a square foot garden. The “bush” varieties, such as the "Porto Rico Sweet Potato,"can be grown within limited spaces. One or two to the square foot planted at the garden’s perimeter should work. The sweet potato is a warm weather vegetable that requires a lengthy frost free season—100 to 125 days.

Horseraish
seeds are difficult to find, but the better nurseries will oftencarry young plants or "sets." Horseradish is a perrenial root crop that will take over your garden if you let it. Therefore, it is not a natural candidate for square foot gardens, but it is possible to sufficiently limit their growth within the confines of a raised garden bed. Plant in the early spring in order to harvest the same year. Otherwise plant in the autumn.

Leafy and Miscellaneous Salad Vegetables...
The various types of "leaf" or "loose-leaf" lettuce, such as Black-seeded Simpson and Oak Leaf are the most commonly planted by backyard gardeners. Just behind them in popularity would be Butterhead or Romaine. Butterhead produces tender leaves with a distinctive flavor in a small loose head. Romaine has an upright elongated head. Crisp head varieties, such as the "Iceburg" types seen in supermarkets are more difficult to grow and are suited for colder climates and won't normally do well elsewhere.
Spinach is another vegetable that can be planted successively, beginning in the early spring, for a continuously harvested crop. Spinach does a little better in cool weather and in warm climates partial shade will probably benefit the plants. It is an ideal candidate for the square foot gardening method.

Green Onions/Scallions - Why the slash? Well, the definitions, I suppose, would depend upon who is doing the defining. Many people say that a green onion is simply how we, in this country, refer to a scallion. Others will tell you that a scallion is a slightly less mature version of the green onion, and that a green onion will have developed a barely perceptible bulb. At any rate, neither is a distinct plant. If left alone, both

will eventually become full blown onions. "Green" onions are among my favorite plants to grow. During certain months nurseries will stock onion "sets." Seare simply small bulbs, usually less than an inch in diameter.

There is an abundance of Tomato growing information on the internet, so I'll just point out that Tomatoes, the bush type, do well in a raised square foot garden. Among the most popular of cultivated plants, tomatoes are technically a fruit that is usually prepared as a vegetable. There are roughly 7500 types of cultivated tomato, ranging in color from yellow to red, purple and black.

**Cucumbers probably originated in India roughly 3000 years ago, making their way to Europe in the 6th or 7th centuries A.D. Despite the asteriks, some of the bush varieties of cucumber can be grown in square foot gardens, either at the perimeter or in containers.

Cucumbers thrive in full sun and nutrient rich soil. Mulch frequently. Pick cucumbers at leasgt every other day to promote continual production.

As with all peppers, Bell Peppers are a warm weather plant. In August and September, Bells thrive and even seem to do best in those hottest months. In cooler climates you may want to start the plantrs indoors in the spring, moving them to the garden once it gets warm.
Squash may be the most popular garden vegetable. Maybe the best known of the summer squashes, Zucchini is an extremely prolific producer. One zucchini plant and one summer squash should feed a family of four throughout the summer.

They don't do well in acidic soil. An optimum pH range would be 6 to 6.5. Carrots don't require a lot of space, so you can plant at intervals of 3 inches. In other words, each 1-foot square should contain 16 plants. Germination occurs at 6 to 18 days.

Pumpkins are a fun crop that, believe it or not, can be grown in a square foot garden, as long as you use a vertical frame of the sort used for tomatoes and melons. Pumpkins are a warm season vegetable easily damaged by frost. To harvest in time for Haloween, plant between late May and early July. They like at least 6 hours of direct sunlight. Pumpkins are heavy feeders and

Potatoes
will do well in a square foot garden, and digging them up is always like a treasure hunt, since you never know what will turn up. For large potatoes grow only one plant per square. For "new" or young, tender potatoes, you can try as many as four plants per square.

Plant in the spring in ground that is moist, but not overly so. Prior to planting, it might be a good idea to expose your seed potatoes to warmth for a couple of weeks to speed up the sprouting process. It is a good idea to add mulch or other organic material to the soil below

Monday

A bit of history

Have you ever heard of sea cabbage, a wild cousin of the domesticated brassicas? Did you know that edible bananas are a primitive plant thought to be related to some of the first trees of the primeval forest? A good book to read is called The Origins of Fruit and Vegetables by Johnathan Roberts

History, especially garden history, is certainly not a science. Garden history is about a tug of war between man & nature. When man gets to the point that he can produce enough to sustain his family off the land, he begins to convert some of his land into art -- a garden.

Richard Bradley, an English garden writer who was appointed the first Professor of Botany, Cambridge University in 1724, included a page of garden tools in one of his books published’


1 Spade. The first instument the Gardener takes in his hand to learn a dexterity in turning up the Ground and working it smooth and even and it is chiefly used by Apprentices.
2 Shovel. Used for throwing Earth out of Trenches or Ditches or for throwing rakings into a Wheelbarrow or Dosser.
3 Rakes. This tool is in the Gardener's Trade. a symbol of Neatness. One for smoothing Beds and Plots, the other for cleaning the Walks.
4 Rakers. A necessary tool for keeping the Garden clean of weeds.
5 Displanter. Used for transplanting and for taking up all Flowers, that the Gardener is obliged to transplant from the place where they were sowed to another.
6 Prining knife. So necessary, that a Gardener ought always to have one in his pocket for there's a hundred occasions in the way of Gardening to make use of it.
7 Dibbles. For planting small flowers that have roots and for planting Bulbs.
8 Watering Pot. Nothing is more useful in a Garden than a Watering-Pot, so that a Gardner cannot be without it. It imitates the rain, falling from the Heavens.
9 Beetle. This serves to smooth the Walkes and hinders most effectively the growing of Weeds upon 'em.
10 Flower Basket. A Gardener that cultivates Flowers, ought to have Baskets by him, to gather the Flowrs in upon occasion. This sort of Basket, shew a Gardener's Neatness and the genteel way of his Profession.
11 Sieve. 'Tis by this that the Earth is reduced almost to Dust and is rendered fit for receiving Anemones, Rannunculas, and other fine flowers.
12 Saw. 'Tis used for cutting the Branches which he can't lop with his knife.
13 Transplanter. Used for raising together with the earth, plants for transplanting.
14 Garden Pot. A Gardner ought to have good store of Pots to put some Flowers in, that grow better fo than in full Earth, such as Pinks, Bears-Ears, Tube-roses, &c. These may be either of plain Earth, or of Dutch Ware, the former are much larger, for holding Jessamins, Clove-Gill-flowers, and such other Plants.
15 Plainer, or Rabot. Tho you run the Rake never so often along the Walks and Paths of a Garden, it will leave some Roughness which is easily rectified with an Inftrument call'd a Rabot; and therefore a neat Gardiner ought not to be without it.
16 Paillassons or Panniers of Straw. This is very necessary to keep out the Froft, which would hurt the Flowers that are sowed, especially those who can't bear much cold.
17 Mallet. Used with the Chisel for lopping the Branches, that can't be so neatly taken off with the force of one's hands.
18 Wheelbarrow. To carry the Stones and Rakings of a Garden, to, places appointed to receive 'em ; or, to carry Earth, or Mold, to improve such Grounds as are hungry.
19 Handbarrow. To carry into the Greenhouse, Trees or Shrubs, set in Boxes, which a Man can't carry upon his Arm. Tis likewise of use for carrying Dung upon the Beds.
20 Catterpiller Sheers. For removing Catterpillers, which would otherwise deftroy all- It has a Handle ten foot long fitted to it, that it may reach to the upper Pans of a Tree. They clip, or cut the end of the Branch upon which the tuft of Catterpillers is lodg'd.
21 Garden Sheers. They are of use for trimming the Box, Yews, and other Trees and Shrubs, that serve to embellish a Garden.
22 Double Ladder. For trimming the upper part of the Arbour, or high Bower.
23 Pickaxe. For raising the Plants that adorn the Borders...or for giving some small Culture to Trees and Shrubs.
24 Rolling Stone. For smoothing Walks after they are raked.
25 Hook. A Gardener that has Rows of Greens to dress, can't trim them well without a hook, which is used after a certain way.
26 Glass Bell
. A Forist can't be without this unless he has a mind to run the risk of losing his Plants, such as are soon in Beds immediately after the end of Winter.
27 Straw Bell. Proper for covering Plants newly transplanted in order to guard them from the Heat or the Sun, which might annoy them at first.
28 Garden Fork. For spreding and disposing of Dung upon the Beds.
29 Trowel. By the help of which a Flower Gardener takes up Plants with Earth around them.
30 Hurdle. For passing the Earth through. Of great use for separating the good Earth from the Stones.

Saturday

Gardening tips


Tips and Tricks for Better Plants and a Better Garden
General
Use old tights or odd socks for tree and plant ties as they are nice and soft, flexible and won’t cut into the stem.
When watering your plants, make sure that you give them a really good drink. Just giving them a short watering encourages the roots to develop closer to the surface of the soil, making the plant less drought tolerant and more susceptible to be rocked by the wind.
Water hanging baskets by putting ice cubes on the top. As they melt moisture is slowly released.
Age new statues by smearing on natural yoghurt
Banana skins are good for feeding roses.
Stop cut tulips from flopping in a vase by putting a pin through the stem just under the flower.
Fizzy, sugary drinks can be used as plant feed in vases and alcohol can sterilise the water just like a drop of bleach.
Vegetables
Golden rule for planting vegetable seeds, don’t sow too early, too thickly or too deeply.
Runner beans can be grown as an ornamental climber – originally they were grown as ornamentals in Victorian times before they were grown for food.
Don’t plant cauliflowers in sandy soil or they will fail.
Brussels Sprouts will fail on loose, infertile soil, so make sure the soil is enriched with well-rotted manure the winter before sowing. Also, ridge up the plants with soil and firm them in. Brassicas also like alkaline soils so lime if necessary the previous winter.
Plant food-bearing plants when the moon is waxing (increasing to a full moon) and ornamentals when the moon is waning (decreasing).

Pest Control Plant some Marigolds around the vegetable garden and they will keep pests away. Companion planting.
To keep rabbits away from your crops, it was said to plant a row of onions ,chives or garlic. (anything from the allium family).
Plant garlic and chives among roses to keep greenfly away.
Methylated spirits can be used to control wooly aphids.
To prevent slugs getting to plants in containers, smear the outside of the container with Vaseline or WD40 .
Ants nests can damage grass roots in lawns so apply ant gel or clove oil in a watering can. Ants don’t like water.

Planting and Sowing
-When sowing seeds, use a pencil dipped into water to pick up the seeds and place them onto the growing medium. That way you don’t lose any. Or use a match stick.
-Mix fine seed with sand for ease of sowing. You can also use non-scented talcum powder so you can see them as you are sowing them.
When planting trees, dig a square hole rather than a round one as it allows the roots to spread out evenly.
When to plant trees, shrubs, perennials, bulbs and vegetables
When to Plant
In general, you can plant trees and shrubs all year round as long as the soil isn’t frozen, covered with snow or waterlogged. Bear in mind though that if we have a hot summer and it is really dry you will need to keep the plants well watered. This applies to container grown plants, bare-rooted plants should be planted in the autumn when the soil is still warm.

Planting Trees
The best time to plant trees is late autumn to early spring (October to March) when they are in a dormant state. Most apple trees are planted October to December.
Prepare the soil a couple of weeks before planting by digging in plenty of organic material. To plant simply dig a hole large enough to take the roots, generally twice the size of the pot, place the tree in the hole and cover the roots with soil up to the surrounding ground level. Trees should be planted in a square hole to encourage even rooting. The tree should be planted to the same depth as it was in the pot and not any deeper – the biggest cause of tree death is planting too deeply. Having planted the tree, firm down the soil using your boots to ensure the soil is in good contact with the roots and water well to wash the soil in around its roots.
(Note – when planting fruit trees the graft union should be at least 3-4 inches above soil level).
If necessary the tree should be staked, with the stake being driven into the soil at a 45 degree angle, being careful not to go through the root ball. Tie the trunk to the stake using plastic tree ties available from the garden centre. Do not use wire or string as this will cut into the tree trunk with time and damage it. You will need to check the ties in the first couple of years to ensure that they don’t become too tight.

Planting Shrubs
You can’t go far wrong if you plant evergreens in early to mid-autumn or mid to late spring, and deciduous shrubs between mid-autumn and early spring when soil and weather conditions are favourable. Good soil preparation is important and it is a good idea to dig in good organic matter before you plant to give them a good start. Dig a hole about twice the size of the pot that the plant is in and loosely fork over the bottom of the hole. Tease out the roots so they are encouraged to grow into the surrounding soil and plant to the same level as they are in the pot and then back fill the hole with soil and firm in. Some shrubs should be planted slightly deeper such as roses and clematis, roses to cover the union of the graft and clematis to discourage wilt but on the whole most shrubs shouldn’t be planted too deeply. Rhododendrons for example always do better if not planted too deeply, as do phormiums, if in doubt check the label. Water in well.

Planting Perennials
Generally, perennials can be planted during autumn or spring, although containerised plants can go in at any time provided the ground is not frozen or waterlogged. Make sure that the root balls are thoroughly soaked before planting, if really dry soak in a bucket for a few minutes. Dig the planting hole of a shape and size to allow the roots to spread comfortably, and at a depth to the level of the crown – the point where the stems and roots join. Firm the plant in and water thoroughly if the soil is dry.

Planting Annuals
Annuals can be planted mid-spring to early summer, depending on the location and the type of plant. Begin with the hardier ones, such as sweet peas and pansies, and finish with the more tender types such as pelargoniums and fuchsias when the danger of frost has subsided. Before planting, water the containers and allow the plants to absorb the moisture before moving them. During dry periods, puddle them in – fill the planting hole with water and allow it to soak in, then set the plant in place and fill the hole with soil.

Planting Bulbs
Spring flowering bulbs such as daffodils and crocus should be planted in the autumn preferably by the end of September. Tulips are best planted in November but can be left to December at a push. As a general rule plant the bulb at a depth that is 3 times the size of the bulb itself ( if a bulb is 1 inch in size then there should be 3 inches from the surface to the top of the bulb). Plant in groups rather than singly. Dig a hole to the required planting depth and then space them at least twice the bulb’s own height and width apart. Carefully replace the soil and gently firm with the back of a rake.

Planting and Sowing vegetables
Growing vegetables from seed can be quite challenging, but basically the thing to remember is not to sow them too early, not too deeply and not too thickly. Sowing also depends on whether you sow indoors or outdoors directly in the soil. Decide on what you want to grow and have a good look at the seed packets for detailed growing information. You also may not want to grow from seed but buy plants from the garden centre if you are short of time and grow them on. Consider growing heritage varieties of veg such as purple peas (Lancashire Lad) or white carrots (White Belgium)

Sowing seed outdoors – Prepare the seed bed in early spring, wait until the soil dries out and doesn’t stick to your boots. Dig over the area you want to plant into (in some cases you will have done this already in the winter) and break down the clods of soil with the back of a fork. Rake level, removing large stones, aiming for the soil to have a consistency of coarse breadcrumbs.
Mark out the row with a taut piece of string and with the edge of a hoe draw out a drill to the depth recommended for the vegetable to be sown. Water the row before sowing, once sown cover the seed gently with soil with back of a rake.

Sowing seed indoors – Choose plastic rather than wooden containers, using trays, small pots or cellular trays and use a seed or multi-purpose compost. Firm the compost in place and water it. Sow according to the instructions on the packet. Do not cover very fine seed with compost. Other seeds should be covered with compost or vermiculite to a depth which is twice the diameter of the seed. Most seeds require a fairly warm temperature to germinate (about 70 degrees F). If you haven’t got access to a greenhouse most seed can germinate on the windowsill of a central heated room. Keep well watered with a fine sprayer ensuring the compost doesn’t dry out.
As soon as the first set of true leaves have opened the seedlings should be pricked out into small pots or cellular trays. Once they get to this stage high temperatures are not required and 50-55 degrees are OK. When the seedlings have recovered from the pricking out move, they must be hardened off to prepare them for life outside. Move to a cold frame and then open on dry frost free days. Later keep them open day and night for 7 days before planting out. Windowsill plantings should be moved into an unheated room before being stood out for a few days prior to planting outside in the garden.

January
• Sow Bulb Onions seeds under glass
February
• Sow early Carrot seeds in a cold frame
• Sow Bulb Onions and Lettuces under glass
• Sow Beetroot, Spinach and Carrots in the soil, will need protection
March
• Continue to sow Early Peas and Broad Beans in mild areas
• Sow Lettuces, Radishes and Spring Onions in the soil
• Sow Summer Cabbages, Leeks and Brussels Sprouts in a seed bed
• Sow Tomato seeds in trays or pots and keep at 18°C (65°F)
• Sow Beetroots, Carrots and Turnips in the soil
• In the south, plant Early Potatoes and Onion Sets at the end of the month providing the soil is not excessively wet
April
• Continue to sow Lettuces, Radishes and Spring Onions in the soil
• Sow Cucumbers, Marrows, Pumpkins and Squashes under glass
• Sow Winter Cabbages and Late Summer Cauliflowers in a seed bed
• Continue to plant Onion Sets
• Plant out Onions grown from seed under glass into the soil
• Plant out Asparagus crowns (will take 2 years for harvest)
• Sow leaf beet and chard outside
• In the north, plant Early Potatoes providing the soil is not excessively wet
• Plant Main Crop Potatoes
• Plant Onion Sets and Potatoes in the middle of the month unless the soil is excessively wet
• Plant Tomatoes in the greenhouse or in cold frame
May
• Continue to sow Lettuces, Radishes and Spring Onions in the soil
• In the north, sow Runner Beans under glass
• Sow French Beans, Runner Beans and Long Rooted Beetroot towards the end of the month when the frost risk has subsided
• Plant out Late Summer Cauliflowers
• In the north, plant out Brussels Sprouts
• Plant out Cucumbers, Marrows, Pumpkins and Squashes towards the end of the month
June
• Continue to sow French Beans, Peas and salad crops in the soil
• Continue to plant out Cucumbers, Marrows, Pumpkins and Squashes
• Plant out Brussels Sprouts and Winter Cabbages
• Plant out Tomatoes
• Plant out Leeks
July

• Continue to sow salad crops in the soil
• Complete planting Brussels Sprouts, Leeks and Winter Cabbages
August
• Sow early Spring Cabbages
September
• Plant out Spring Cabbages towards the end of the month
November
-Sow autumn broad beans such as Aquadulce to provide beans for June, winter peas


Ornamental Veggies: Urban dwellers and other small space gardeners can make better use of their space by tucking veggies and edibles in amongst their bedding plants rather than separating them out into distinct gardens, or grow some in hanging baskets . There are lots of unusual edibles available with gorgeous flowers and foliage. Try 'Red Burgundy Okra', 'Bull's Blood' Beets, 'Mascara' lettuce, and 'Lipstick' strawberries, to name a few.


Hold Dirt in with Coffee Filters or old tea bags
You can use coffee filters and tea bags as an alternative to rocks or terracotta shards over holes in containers to keep the dirt from falling out.


You can collect Free coffee grounds at Starbucks or ask your local coffee shop to save you some.
Coffee grounds can provide a valuable source of nutrition for your garden.
Applying coffee grinds directly to your garden:


Coffee grounds can be applied directly as a top dressing to acid loving plants like blueberries, hydrangeas, and azaleas (acid loving plants thrive in areas where rainfall is common in the warm season).
Adding brown material such as leaves and dried grass to the mulch will help keep a balanced soil pH.
Mixing coffee grounds in your compost:
Coffee grounds act as a green material with a carbon-nitrogen (C-N) ratio of 20-1. Combined with browns such as leaves and straw, coffee grounds generate heat and will speed up the compost process. Don’t make your coffee grounds more than 25% of any one pile’s content.
Using coffee grounds in your worm bin:
Worms fed with coffee grounds and other vegetarian materials will flourish.


Lighten Your Containers and Save Soil: To decrease weight and for really good drainage, use foam peanuts or broken pieces of styrofoam in the bottom of your pots, then fill with soil. While no one should go out and buy the stuff, it tends to sneak up on you anyway -- at least this way it can be useful and reuseable.


Pepper Plant Spray: A great way to help along your pepper plant blossoms in setting fruit is to add a bit of espom salts to a spray bottle and spray it directly onto the leaves and buds as they are just developing. Epsom salts contain magnesium which pepper plants need to produce healthy peppers.

Magazine Subscription Cards Put to Good Use:
Instead of throwing out all those annoying subscription cards that fall out of every magazine, turn them into seed packets. Just fold them over and seal the edges with glue or tape. Make sure to note what is in each packet- unless you like surprises.

Weed Control in Vegetable Gardens: A great way to avoid weeds around vegetable crops such as tomatoes or squash is to plant low growing, quick harvest crops such as lettuce or radish around the base of the larger veggies. This will fill up the empty spaces until the late harvest plants have filled out more, providing less places for weeds to grow. It will also keep the soil around the plant shaded and moist which means less watering.

Natural Herbicides: If you have small areas or cracks and crevices that you need to weed try these natural herbicides. They won't damage the environment and are nontoxic to mammals and beneficial insects. Vinegar and salt is great for places where you won't be growing anything in the near future. Spray directly on plants. To remove young plants, pour boiling water directly on them. This is the simplest, yet safest herbicide there is. Just be careful to avoid plants that you don't want to damage.

Super-size Your Basil & other herbs .
Tired of waiting until midsummer to harvest basil & herbs fresh from your garden? While waiting for your seedlings to develop into plants, buy a basil or herb plant which you purchased at grocery section at your local store.
Just dived the plant into small bundels, place in to pot or straight into the garden & water well.
Herbs also grow & look great in a hanging basket


Growing Tomatoes in Containers: There are two types of tomatoes, determinate and indeterminate. Determinate ripen their fruit all at one time. Indeterminate have fruit production throughout the season. Determinant plants are better for container growing because they will stay compact (also the Husky variety, a dwarf indeterminant, is also great for containers). Indeterminant plants get huge and will need support.


Fast Rooting: When rooting cuttings in water, you can actually speed up the process by placing a piece of willow branch in the water along with the cutting. Willow contains natural auxins, a hormone that stimulates root growth and development. These chemicals are synthetically produced and used in powdered and gel rooting hormones.

Shredded Paper Mulch:
After using your paper shredder, store the paper until you have enough to use as a base layer of mulch with compost or manure spread over it to winterize your plants. Remember not to use glossy paper ads.

Super Sized Containers: Large pots can take a lot of soil to fill and they weigh a ton once they are full. It is unnecessary to completely fill a container with soil if you are planting shallow-rooted plants. Place some styrofoam chunks, styrofoam peanuts, old plastic pots or soda cans in the bottom of the container as filler. It will make the container lighter for easy moving, and save money too.

Save Money: Purchase perennials in mid /end summer.
Many garden centers will have sales at this time of year and by next summer they will be larger and in full bloom. Look at the reduced section even if the plant looks a bit on it's last legs ,floppy or dull these plants will go in the reduced sale section ,but with a bit of TLC they will look great next year .

Quick Space Fillers: Often when you start a new perennial garden it will take some time for the plants to grow and your garden may look a little bare. Plant fast growing annuals in the empty spaces until the perennials grow large enough to take over.

Save Your Flower Seeds: You can save money by harvesting seeds from your flowering plants for next year. Snip off seed heads when they are ripe and shake them into a brown paper bag. Make your own seed packets using paper envelopes. You can write the name of the corresponding plant onto the envelope or decorate them to give away to friends. Seeds should be stored in a cool, dark and dry place.


The Mint Pot: Don't let mint and other invasive herbs take over your garden.
Curb their wild tendencies by planting mint in a pot, then planting the pot into the soil.

Get Your Indoor Plants Out of the House:
Houseplants love a warm summer rain much more than cold tap water.